Actions
Introduction
Perhaps the most important piece of Streamer.bot, actions are at the center of everything you do.
You can configure actions for anything from basic alerts and shoutouts to extremely complex integrations such as TerrierDart's Leaderboard Points System
Actions consist of configurable sets of sub-actions that can be executed by Streamer.bot's event sources, such as Triggers, Commands, various integrations such as Elgato Stream Deck, and even your own voice!
Sub-actions even have the ability to trigger other actions, giving you the ability to organize significant pieces of your setup into consolidated sections, and share logic across multiple event sources.
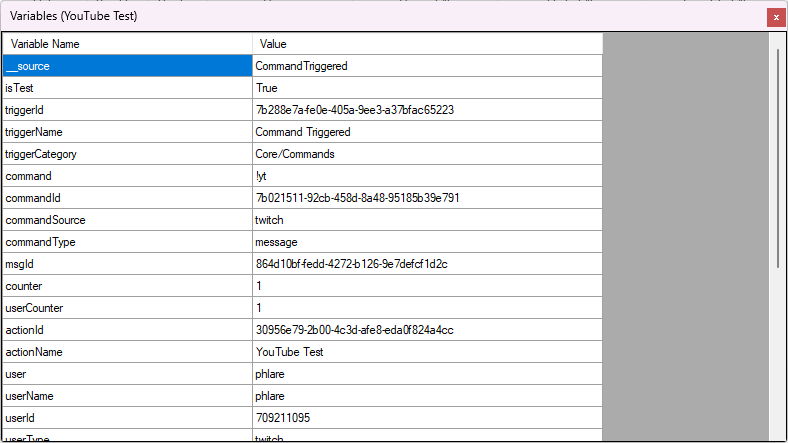
As sub-actions are executed, another important feature of Streamer.bot comes into play, the argument stack, which consists of all variables available at a given time.
Each sub-action has the ability to populate new variables for upcoming sub-actions, read existing variables from earlier sub-actions, or even modify them on the fly!
Actions
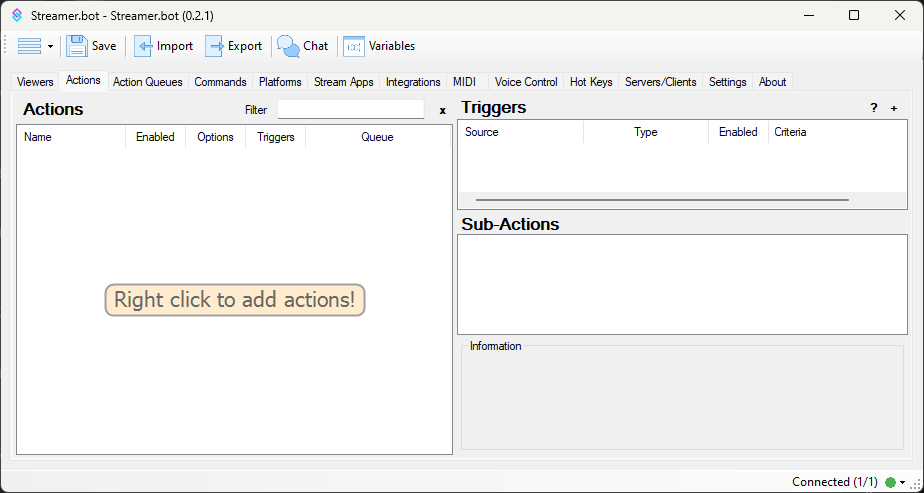
The actions tab is split into 3 main parts:
Actions- All of your configured actions are listed here, sorted by groupTriggers- All triggers configured for the selected action will be listed hereSub-Actions- All sub-actions configured for the selected action will be listed here
Configuration
To create your first action, Right-Click in the actions pane and select Add to open the configuration dialog
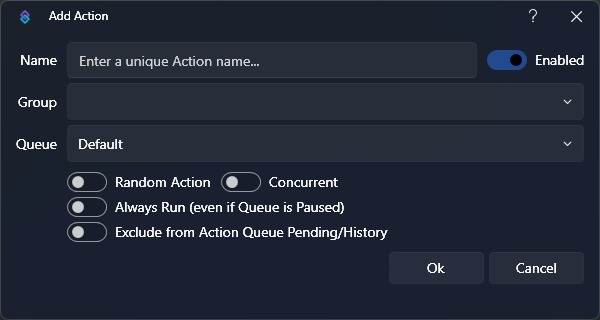
Options
Default queue is configured as a non-blocking queue, meaning actions will execute immediately on request and are allowed to run concurrently.Weight configuration on sub-actions, allowing you to adjust the probability that specific sub-actions will be chosen.Paused state::
Context Menu
Right-Click any existing action to reveal the context menu:
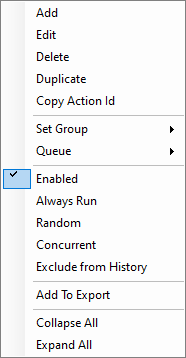
Many of the action configuration options outlined above can be quickly modified here.
Additional context menu options are outlined below:
Options
Add Action dialog.Settings tabID of the selected action to your clipboard.Sub-Actions
To activate the sub-actions pane, you must first select an action via Left-Click in the actions pane.
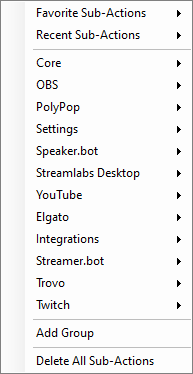
With an action selected, you can then Right-Click anywhere in the sub-actions pane, on the right, to browse available sub-actions and add them to your selected action.

Context Menu
- Right-Click anywhere in the sub-actions pane to browse and add a new sub-action
- Right-Click any existing sub-action to reveal additional context menu options

Options
Settings tab- If the action contains any groups the
Move to Groupsub menu will also display below this option
- Only displays if current selection is a group folder
- Only displays if current selection is a group folder
- Disabled sub-actions will be highlighted with red text
Random ExecutionThis will only execute a single, random sub-action from within the group.Weight options on sub-actions inside that group.
Weighting is used to make a sub-action more or less likely to be chosenSettings tabValid options are
Up, Down, Top, BottomAction Queues
In Streamer.bot, all actions exist within a queue. The Default queue is created automatically and will contain all action executions unless specified otherwise.
Queues
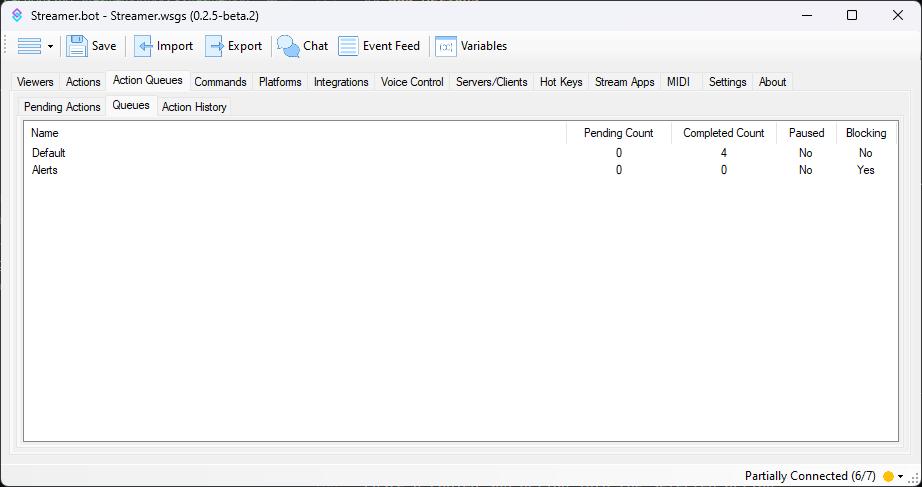
In this section, you will find all the queues that have been created.
At a glance, you can view the status of several queue properties:
Pending Count: Number of actions waiting to be executed within the respective queueCompleted Count: Number of actions that have completed execution within the respective queue- This includes actions that have been cancelled - learn more in Action History
Paused: Shows the current paused status of this queueBlocking: Shows whether the queue is configured as aBlockingqueue
Context Menu
You can Right-Click within the Queues pane to reveal the context menu:
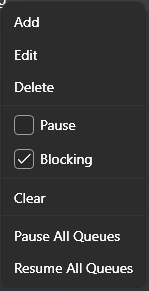
Options
- Available if you Right-Click on a specific queue
- Available if you Right-Click an empty space within the Queues pane
- Available if you Right-Click on a specific queue
- If the queue is currently
Paused, you can selectResumeto restart a queue and trigger any pending actions. - If the queue is currently
Active, you can selectPauseto temporarily stop new actions from being triggered in that queue. Once resumed, pending actions will be processed.
Blocking state of the selected queue.If selected, check mark will appear beside Blocking, indicating that the queue will execute actions in sequence.- Available if you Right-Click on a specific queue
- Available if you Right-Click on a specific queue
- Available if you Right-Click on a specific queue
- Available if you Right-Click an empty space of Queues area
- Available if you Right-Click on a specific queue
- Available if you Right-Click an empty space of Queues area
Configuration
To create a new queue, Right-Click within the queues pane and select Add

Options
Blocking option.Pending Actions
The pending actions view will display any queued actions which are waiting to run.
Action History
The action history view will display a log of all actions that have been executed by Streamer.bot
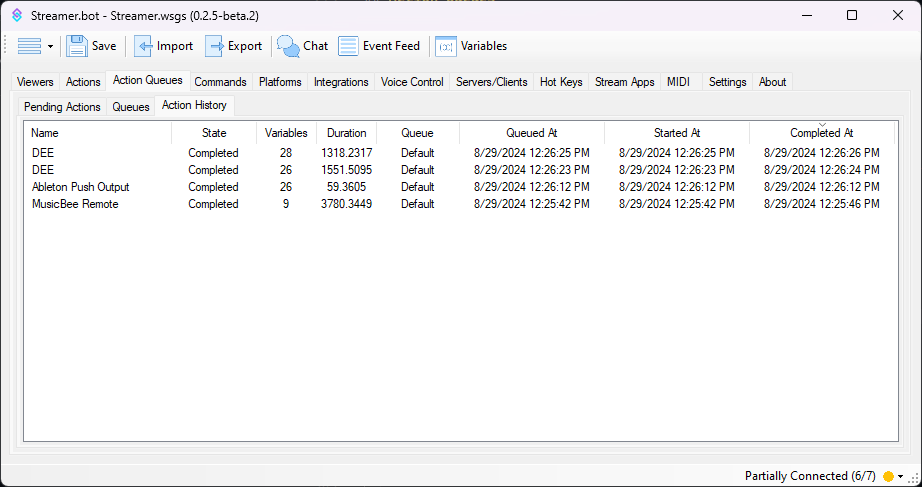
At a glance, you can view the following properties:
Name: The name of the executed actionState: The current status of the executed action- e.g.
Completed,Cancelled,Pending
- e.g.
Variables: The number of variables populated by this actionDuration: Time, in milliseconds, the action took to finish executionQueue: The name of the queue this action was executed inQueued At: The date and time the action was initially queued for executionStarted At: The date and time the action began executionCompleted At: The date and time the action finished execution
Context Menu
You can Right-Click on any entry to open the context menu:
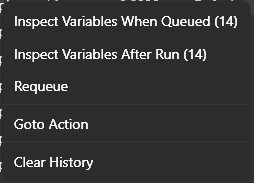

::