Initial Setup Guide
Let's get you up and running with Streamer.bot!
Overview
This guide covers the basics of the following initial setup of Streamer.bot:
- Connect to your streaming platform, such as Twitch or YouTube
- Connect your broadcaster software, such as OBS Studio or Streamlabs Desktop
Platforms
Connect your streaming platform account(s) to enable Streamer.bot to receive events and perform actions such as sending messages to your chat.
Streamer.bot supports both Twitch and YouTube as streaming platforms.
Twitch Setup
Connect your Twitch account to Streamer.bot
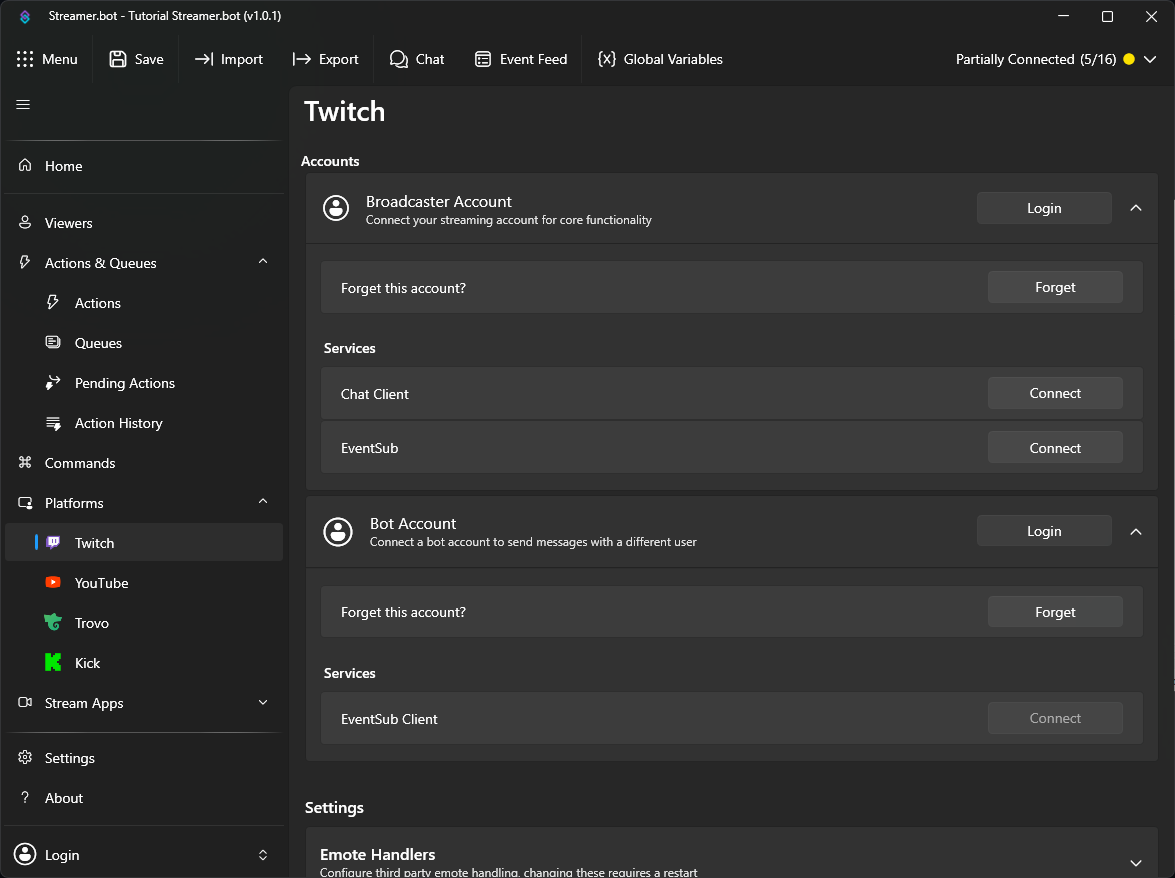
Broadcaster Account
The Broadcaster Account is your primary Twitch account where you host your stream. This connection is required for Streamer.bot to monitor your chat and receive Twitch events.
- Login to Twitch with your primary account
PressLoginto launch the Twitch OAuth screen - Grant permissions
Review all scopes granted to Streamer.bot and allow access to proceed
Bot Account
The Bot Account is an optional second connection if you wish to send chat messages from another account.
- Login to Twitch with a secondary account
PressLoginto launch the Twitch OAuth screen - Grant permissions
Review all scopes granted to Streamer.bot and allow access to proceed
Bot Account has limited permission scope and can only send chat messages or whispers.YouTube Setup
Connect your YouTube account with Streamer.bot
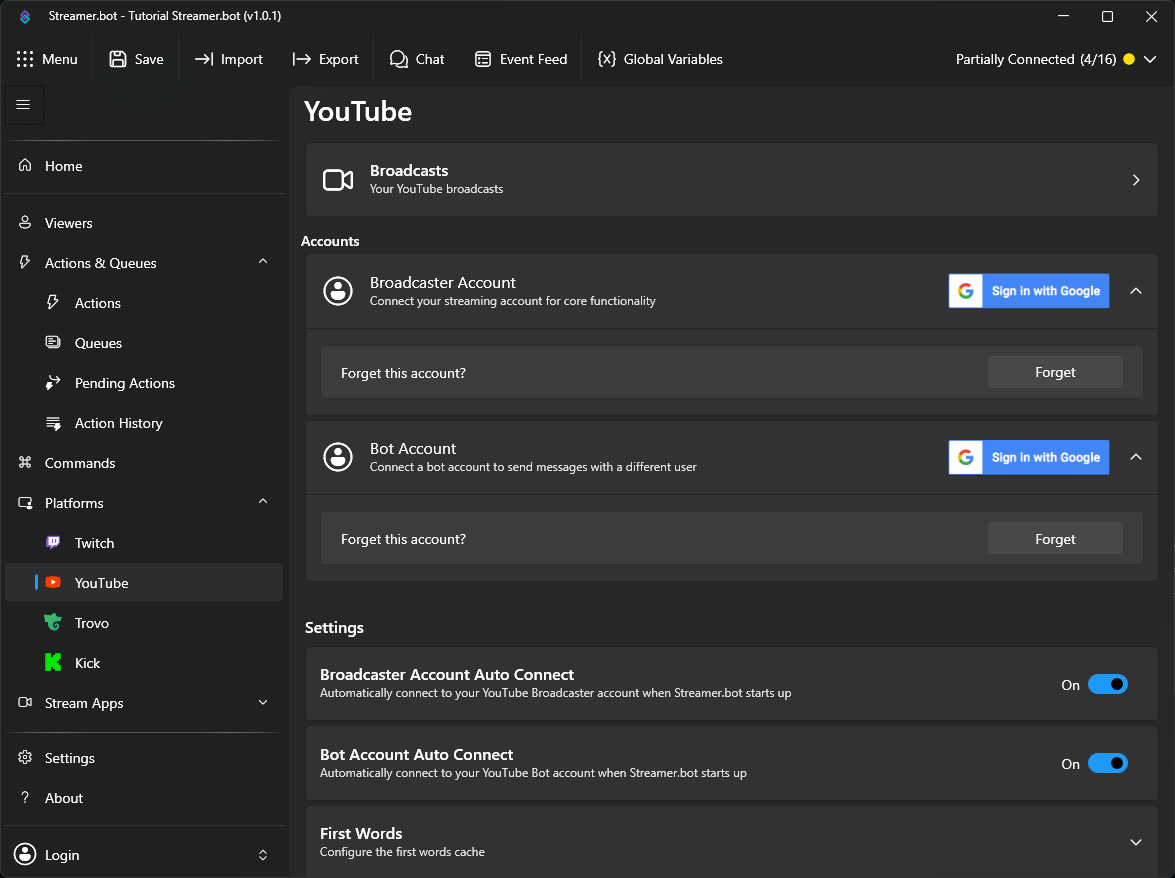
If asked, you must click I Agree to continue to the YouTube configuration screen.
Broadcaster Account
The Broadcaster Account is your primary YouTube account where you host your stream. This connection is required for Streamer.bot to monitor your chat and receive YouTube events.
- Login to YouTube with your primary account
ClickSign in with Googleto launch the Google OAuth screen - Grant permissions
Review all scopes granted to Streamer.bot and allow access to proceed - Auto Connect
EnableAuto Connectto automatically connect to your YouTube account when Streamer.bot starts up
Bot Account
The Bot Account is an optional second connection if you wish to send chat messages from another account.
- Login to YouTube with a secondary account
ClickSign in with Googleto launch the Google OAuth screen - Grant permissions
Review all scopes granted to Streamer.bot and allow access to proceed - Auto Connect
EnableAuto Connectto automatically connect to your YouTube account when Streamer.bot starts up
Broadcasters
Set up your broadcasting software to work with Streamer.bot
OBS Studio
Configure Streamer.bot to remotely control your OBS Studio instance(s).
28.0.0 or later- Enable OBS WebSocket ServerIn OBS Studio, navigate to Tools > WebSocket Server Settings from the menu bar
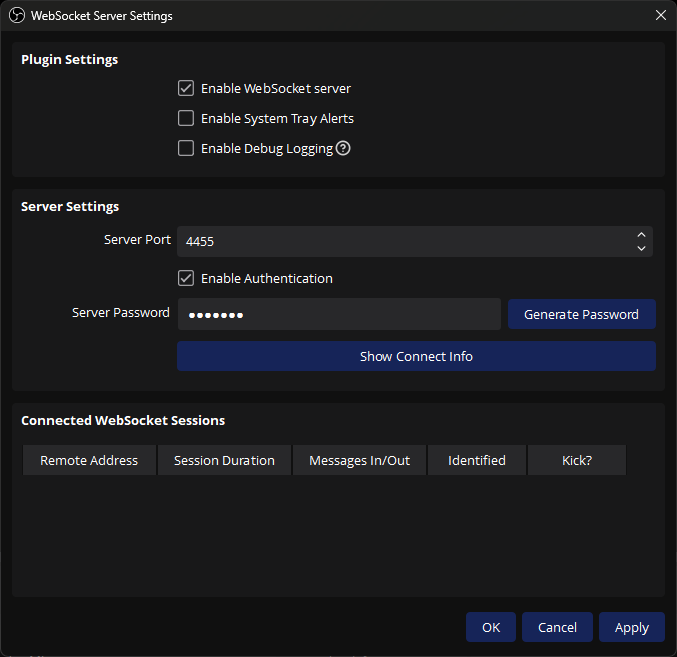 OBS Studio WebSocket SettingsIf you don't see the WebSocket settings, and you have verified you are on version
28.0.0or later, navigate to Help > Verify Files from the menu bar.- Ensure the
Enable WebSocket serversetting is enabled (checked) - Change the
Server Settingsas desired- You will enter these values in Streamer.bot in the next steps
- Ensure the
- Set up your OBS Studio connection in Streamer.botNavigate to Stream Apps > OBS
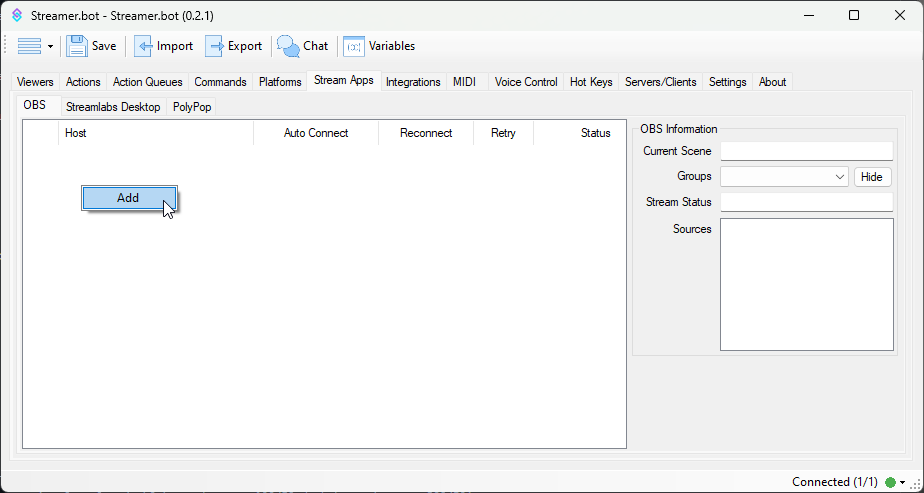 OBS Studio Configuration
To add a new connection, Right-Click anywhere in the panel area and selectAdd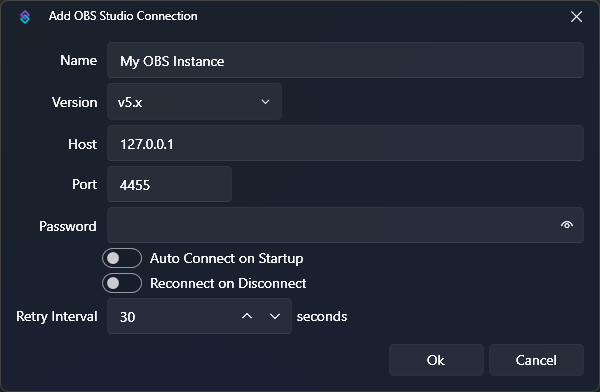 OBS Studio Add Connection
- Enter a name for this OBS connection
- Select version
v5.x - If OBS Studio is running on the same machine, keep
127.0.0.1for theHostfield- For multi-pc setups you can configure this with another LAN IP address
- Configure
PortandPasswordto match theWebSocket Server Settingssetup in OBS Studio - Click
OKwhen you have finished configuration - Right-Click the new instance and select
Connectto force an immediate connection attempt
If you are having trouble connecting, double-check the Host, Port, Password, and Version to ensure it matches your OBS Studio instance.Explore the full OBS Studio Configuration Guide to learn more about all available options.
Streamlabs Desktop
Set up Streamer.bot to remotely control your Streamlabs Desktop instance
- Get Streamlabs API Settings
Obtain your API Token and Port from your Streamlabs Desktop settings.Navigate to Settings > Remote Control in Streamlabs Desktop
undefined
Save these settings for the next steps. - Add Streamlabs Desktop connection to Streamer.botNavigate to Stream Apps > Streamlabs Desktop
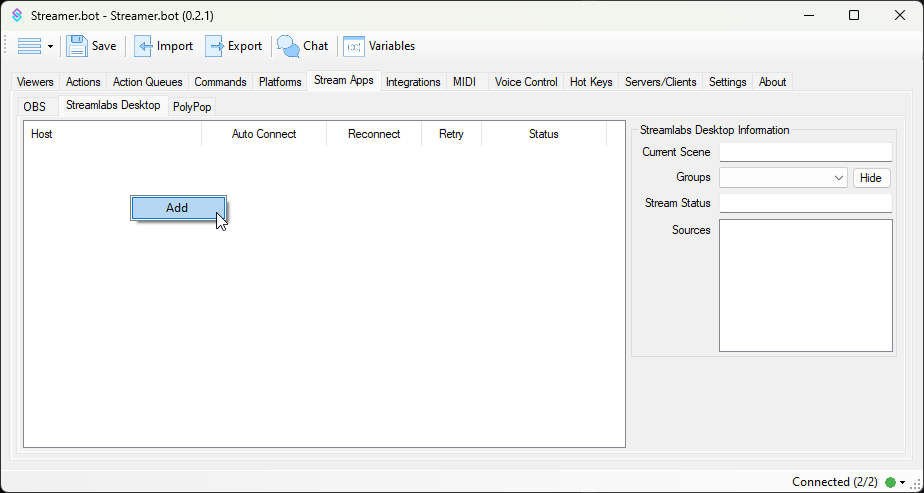 Streamlabs Desktop Configuration
To add a new connection, Right-Click anywhere in the panel area and selectAddExplore the full Streamlabs Desktop Configuration Guide to learn more about all available options.
Meld Studio
Set up Streamer.bot to remotely control your Meld Studio instance
- Enable Remote ConnectionsIn Meld Studio, navigate to File > Preferences > Advanced in Meld Studio
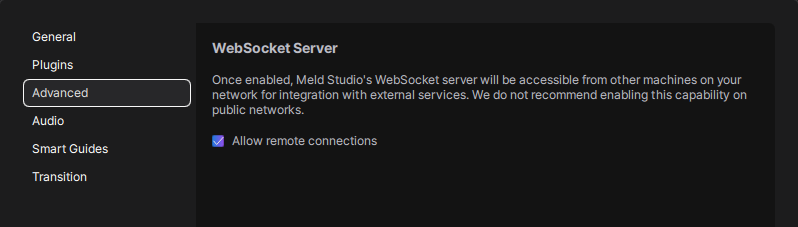 Meld Studio Advanced Settings
- Ensure the
Allow remote connectionsis enabled (checked)
- Ensure the
- Setup your Meld Studio connection in Streamer.botNavigate to Stream Apps > Meld Studio
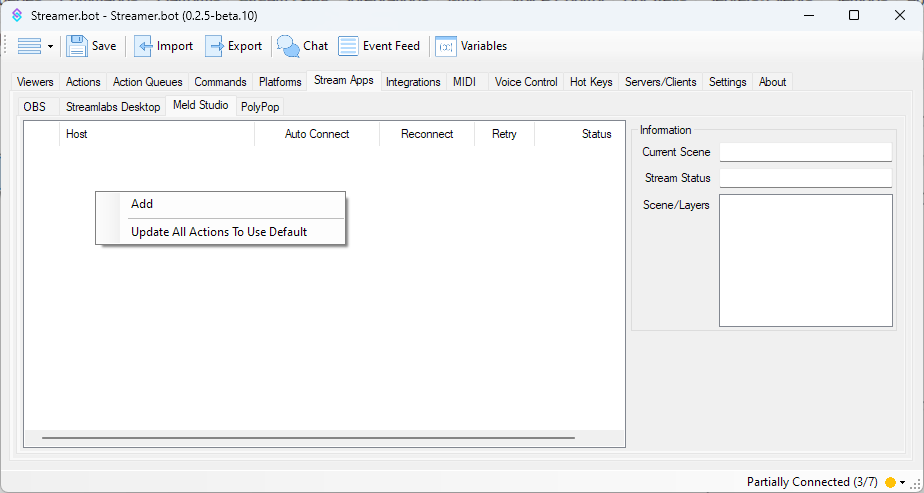 Meld Studio Configuration
To add a new connection, Right-Click anywhere in the panel area and selectAdd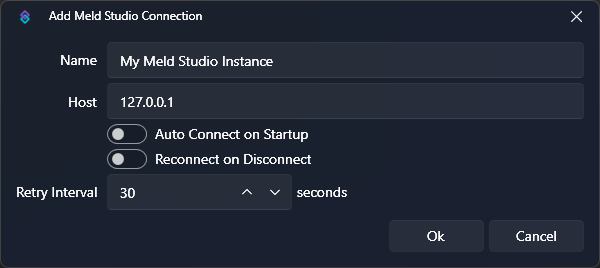 Meld Studio Add Connection
- Enter a name for this Meld Studio connection
- If Meld Studio is running on the same machine, keep
127.0.0.1for theHostfield- For multi-pc setups you can configure this with another LAN IP address
- Click
OKwhen you have finished configuration - Right-Click the new instance and select
Connectto force an immediate connection attempt